Making of irregular plaster

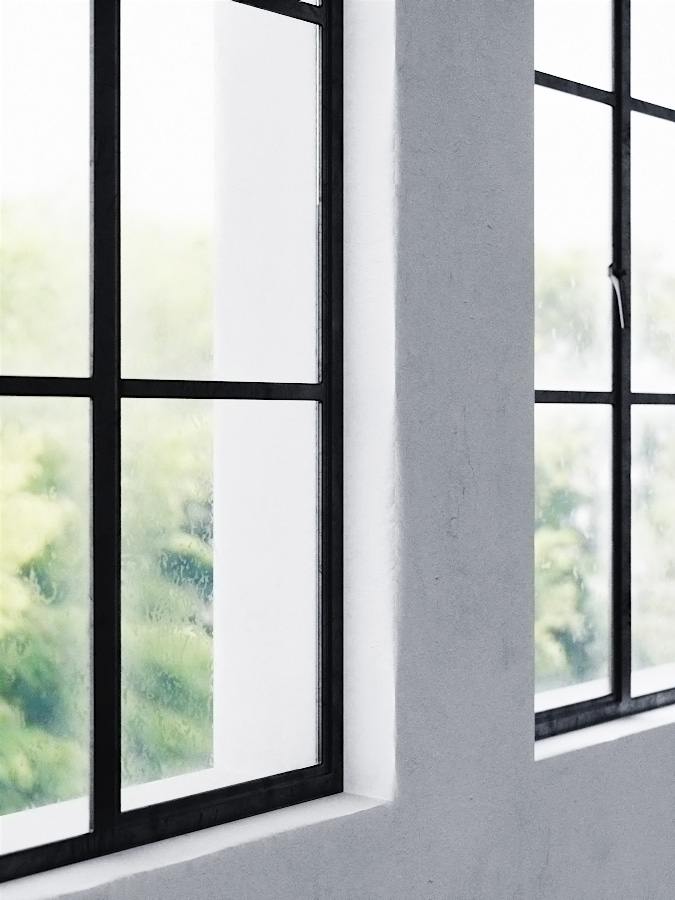
Beauty can be in the imperfection. A breakdown about how to create an irregular plaster material without altering the geometry of the walls.
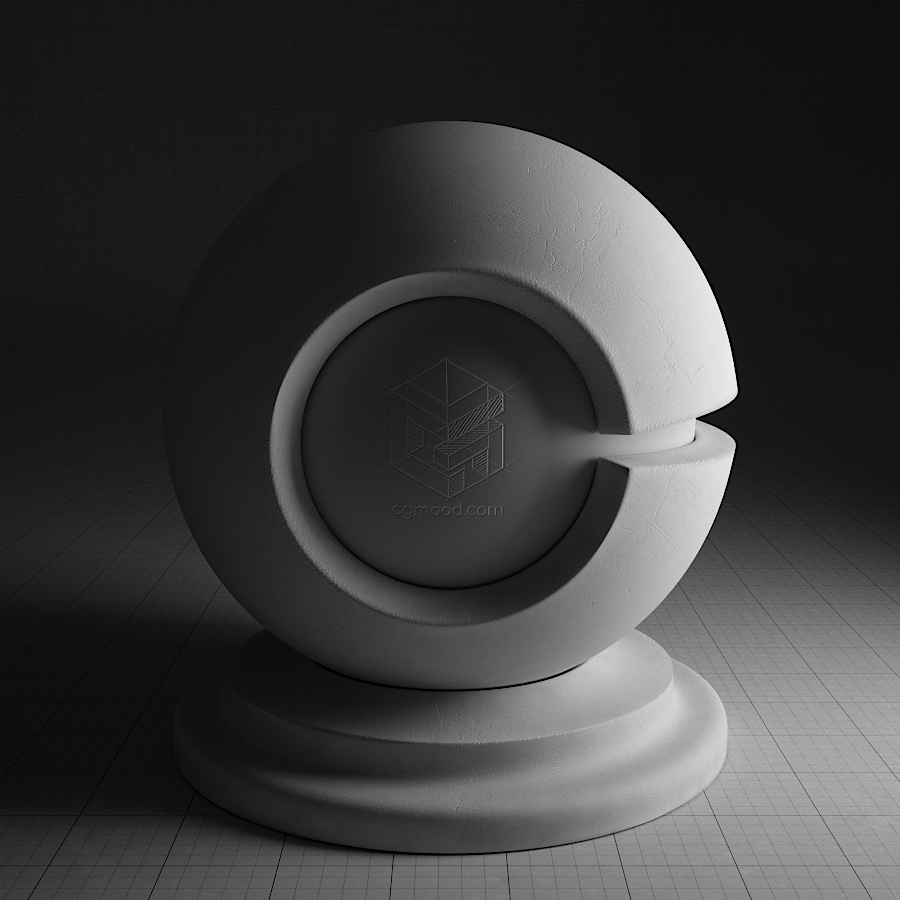
The base material
Let's analyze the final result a bit.


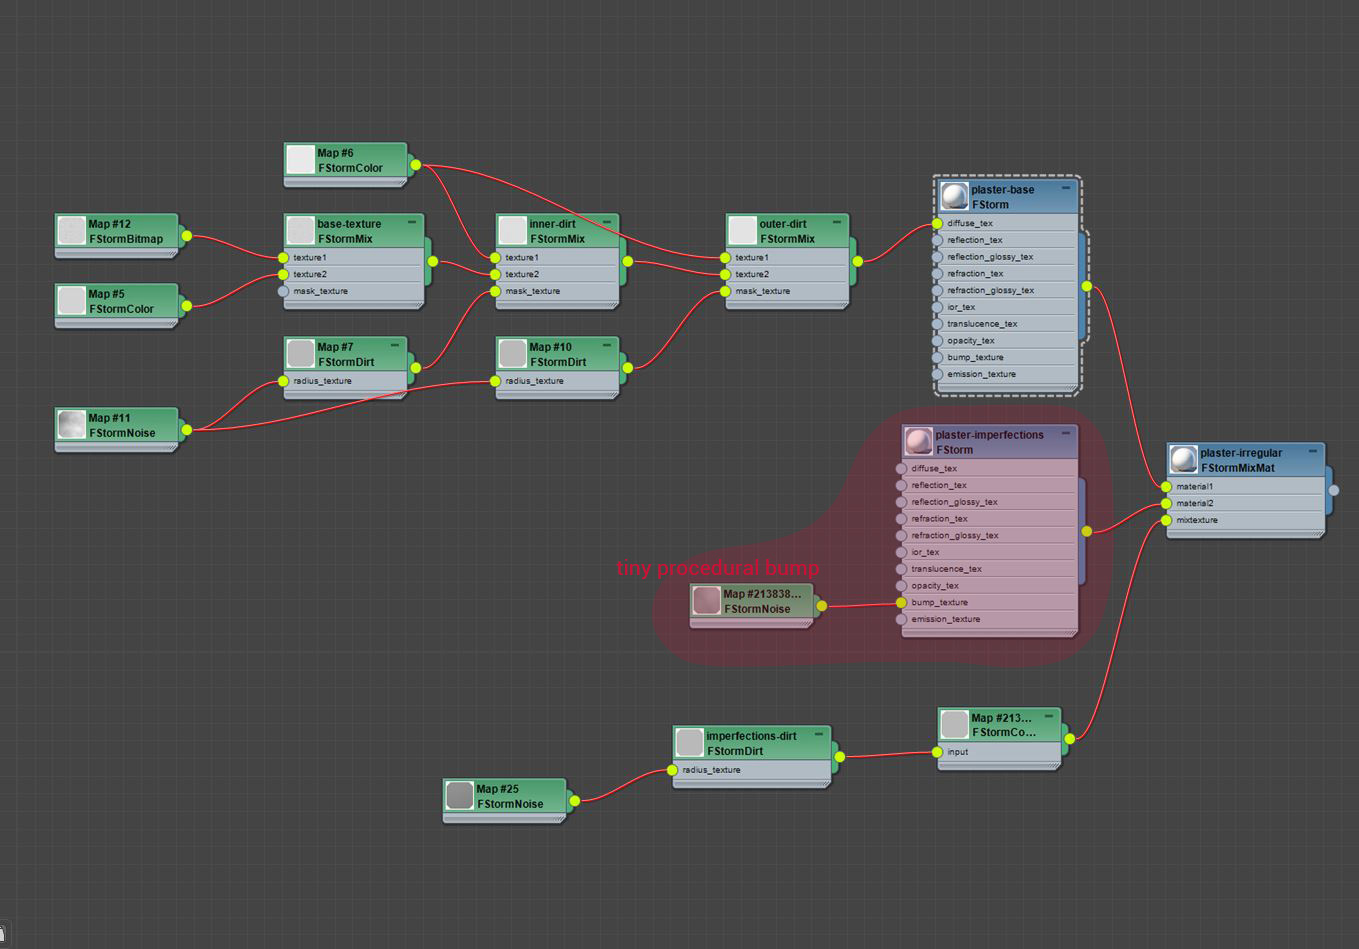
Let's have a look at the complete material node.
As you can see, the final material is composed of the base plaster material and another material that will manage the edge irregularities, mixed together with a noisy dirt map.
As first step, I started with a simple plaster texture (I chose one with some tiny cracks on it, but you may use whatever you want of course), and then smoothed it out a bit by mixing it with a plain color.


Adding the irregular edges


Really hope this small tutorial was useful to you. Of course don't forget to get the material here!
If you wish to support us, you may follow our facebook page!